Duplicate files in your Windows are a common encounter when you search for a particular file in your Windows explorer, and you are shown with number of options with the tagline. Sometimes, users are responsible themselves for creating so many duplicate files due to mistakenly naming files with the names that are already assigned to some other files, or sometimes for the sake of system protection, duplicate files are created by the operating system when invaded by malwares so that if one of the files get corrupted, the contents can be restored from the duplicate files created prior to the invasion.
Many a times, few incompatible softwares or tools also create duplicate file while updating to the newer version keeping the older version as a duplicate random file in the system. In addition to creating confusion to the user often, the load of duplicity overburdens the internal storage of your system which might remain unnoticed to the user for a longer period. Thus in order to deal with this havoc, we will be presenting the usage of three user-friendly free duplicate file remover in this article below. Continue with your reading to know more on the topic:
- Part 1. Remove Duplicate Files with Duplicate Cleaner
- Part 2. Remove Duplicate File Using Fast Duplicate File Finder
- Part 3. Remove Duplicate File by Fast Duplicate File Finder
Part 1. Remove Duplicate Files with Duplicate Cleaner
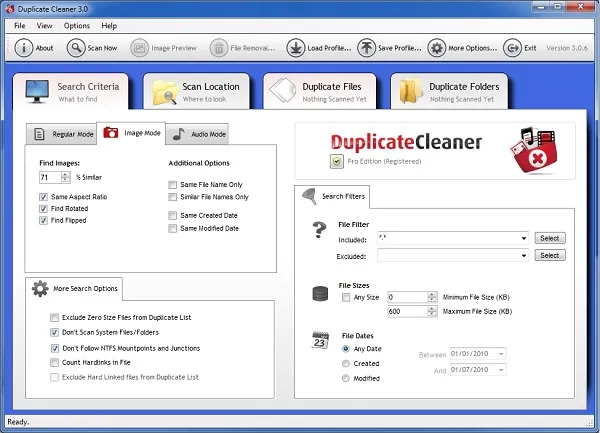
Duplicate Cleaner is a freeware duplicate file removing software which has been in sheer demand for quite a long time. It has got advanced search options which facilitates the search and selection of the duplicate files and thereby their removal in the process.
Step 1. Download and install the program to your computer where you wish to perform the duplicate file deletion process.
Step 2. Run the program with admin privileges.
Step 3. Click on the "Search Criteria" and select the "Regular Mode" search in which all the files are scanned thoroughly.
Step 4. Choose either "Same content" or "Ignore Content" options to continue as per your requirement.
Step 5. Next add the search location and navigate to the folder. Click on the "arrow" button to shift the folder to the "Search Paths" side.
Step 6. Once you are done with this much, click on "Scan Now" button to display the duplicate files.
Step 7. Now to get rid of them, click on the little magic wand icon adjacent to "Selection Assistant". Click on "Mark, and then "Select by group". Then select "All but one file in each group". This will mark all the duplicate files except the real one which needs to be saved.
Step 8. Now click on "File Removal" circular icon above to delete the files altogether.
Also read: 3 Ways to Reset Toshiba Laptop Password without Losing Data
Part 2. Remove Duplicate File Using Fast Duplicate File Finder
Fast Duplicate File Finder is yet another duplicate file removal software which is going to be discussed below in the article section. The free version of this tool will enable you to detect only 10 groups of similar duplicate files of the concerned file and not more than that. The working is mentioned below as follows:
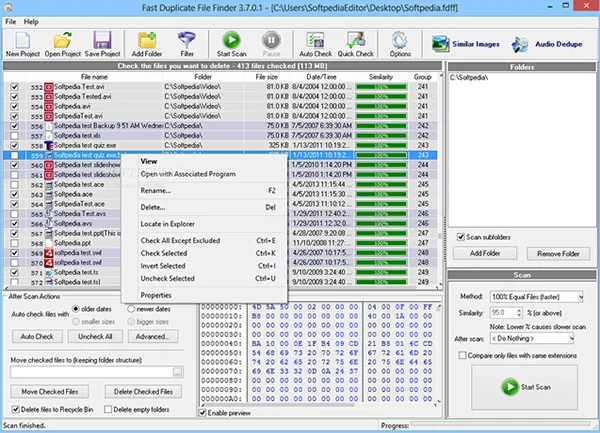
Step 1. Install the program file after downloading from the internet to your target computer.
Step 2. Open the tool and from the tool's main window, click on "Add folder" option from the toolbar to select the folder where you want to search for the duplicate files.
Step 3. Choose your search criteria and then click on "Start Scan" button. After the scanning is done, the tool will show you 100% authentic copies of the same file.
Step 4. Select the files one by one by checking the checkboxes next to the duplicate files and then pressing the "Delete" button from the keyboard.
Part 3. Remove Duplicate File Using SearchMyFiles
NirSoft SearchMyFiles is a wonderful duplicate file finder and remover for Windows OS. It is compatible with Windows 7/ 8/ 10 all the versions. It is basically a super search engine for duplicate files and folders equipped with lot of filters to help you search by dates, content, file size, wildcard, file attributes, etc. The working of the program is explained below in steps:
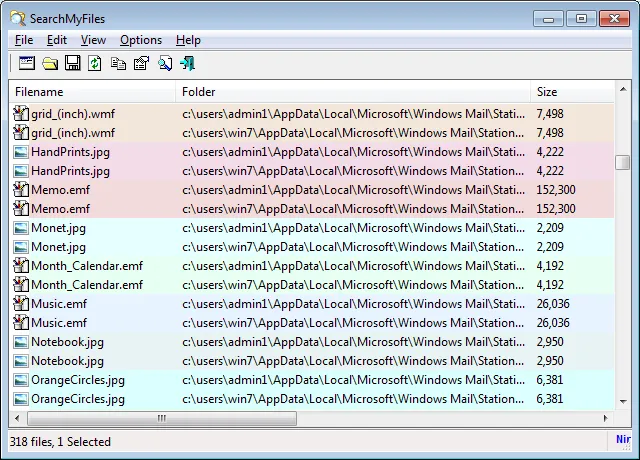
Step 1. Install the software in your system and open it with admin rights.
Step 2. From the main tool's screen, click on the "Search mode" option and select "Duplicate Search" from the drop down menu.
Step 3. Now select the "Base folder" where you want to search for the duplicate files.
Step 4. Don't try to change any of the filters as they are by default configured to search everything. But if you want to restrict the scanning for certain confidential files, then you must use filters for such prevention.
Step 5. Once you are all set to go, click on "Start search" option and the scanning will be initiated.
Step 6. After the scanning is done, all the duplicate files are shown on the display screen, select them one by one and press "Shift + Del" to remove them permanently from your system.
Conclusion
Duplicity of files in your system is a serious issue as it occupies a lot of your valuable space in internal storage for no valid reason. Even though you don't create such multiple duplicate copies of your files, folders, images, videos, all the time, yet they are created by system protection protocols and sometimes by viruses. Thus you need to clean your computer after regular period of time to maintain the full scale performance of the system.