Apple's HEIC format for images was indeed a much-needed addition to the iOS 11 feature-set. Along with increasing storage capacity minimums on all new iPhones, Apple brought in this high-performance image compression technology to the iOS platform. Unfortunately, it's not very friendly with other operating systems like Windows and Android since they don't currently offer native support.
Naturally, a considerable body of apps and online conversion services have cropped up after iOS 11 and HEIC came along, but few of them are reliable enough for iOS 11 users to depend on them for all their image conversion needs. In addition, a lot of them require the photos to be exported and uploaded to a cloud location, which makes it relatively unsafe from a privacy and data security viewpoint.
This article showcases some of the more reliable software and online services for converting HEIC into JPG on a Mac.
Method 1: How to Convert HEIC to JPG by Dropbox for Mac
This file-sharing utility automatically converts HEIC photos into JPGs when you upload from an iPhone and sync it to a PC, and it works for macOS as well as Windows. You have to tweak the settings before it can do that, but it's relatively easy to get it set up.
To do this, simply open Dropbox app on your iOS device and follow these steps: tap the person icon. Then tap the Settings icon. Click on "Camera Uploads". You will see an option "SAVA HEIC PHOTOS AS ". Select that option and choose your desired upload format. Once the upload is completed, you can download the converted JPGs via Dropbox for Mac app.
With this method, you have to remember that your images are being sent to a cloud location. Dropbox is secure enough for you not to worry, but a lot of people prefer doing the conversions natively on their machine rather than sending it over the Internet. However, if you are not using Dropbox, then please check reset of the content in this post.

Method 2: Batch Convert HEIC to JPG on macOS with HEIC Converter
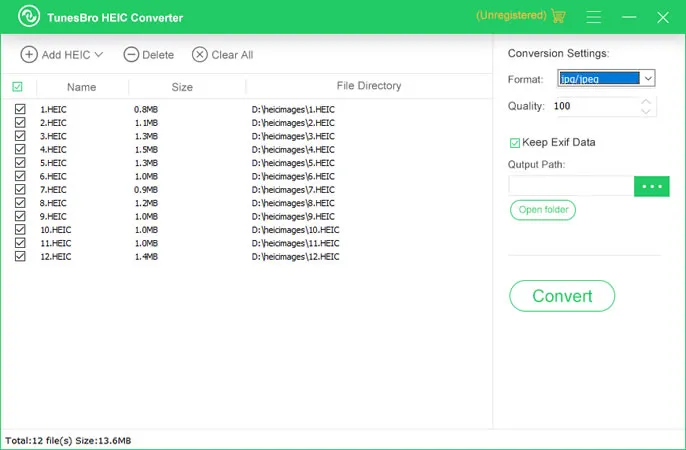
TunesBro HEIC Converter is by far one of the most capable conversion tools for HEIC to JPG and PNG formats on Mac or Windows. It fills the gap left by Apple, and allows you to convert in singles as well as in batches of photos. There's no loss in quality, and you can even control the output quality depending on any storage constraints on the destination drive. There's also an option to retain Exif data if you want.
The utility is very simple to use because the interface is intuitive. All you need to do is choose the conversion mode, pick the files for conversion, set the parameters as described above and hit "Convert." The job's done. The biggest plus is the quality of the output. If you want completely lossless conversion with full file sizes, that's exactly what you'll get. There's no second-guessing with this software.
Top Features of TunesBro HEIC Converter
- Convert multiple images at one time.
- Retain the best quality of out file.
- Work on Windows and Mac computer.
- Superb user friendly interface.
Step 1Download and Install TunesBro HEIC Converter on Mac
First, go to the official website and download the software on a Mac computer. Then follow the instructions to install the program on the computer.
Step 2Add HEIC Files to the Program
Launch the software, and you'll see "Add Heic" button on the screen. Once click on it, you have two options: Add a single HEIC file or Add HEIC Folder, which means you can convert multiple HEIC files at one time. Pick the preferred mode for the conversion job.
Step 3Adjust Output Settings
In this step you'll need to select the image or images to be converted. This is also where you'll be selecting the output path and quality, the choice of keeping Exif data and the output format - either JPG or PNG. Set the parameters to what you want.

4 Start Converting HEIC to JPG on Mac
Now click on "Convert" and the job will be completed in less than 5 minutes. With the batch mode you can convert more than 100 images in one go.

Method 3: How to Convert HEIC to JPG Mac with iMazing App
This app does a pretty good job of converting HEIC files into JPGs. It also offers some neat features like being able to control the quality and compression on the JPG output files, and retain the Exif metadata.
Some users have complained about frequent crashes and the drag and drop feature not working all the time, but if you only convert photos once in a while then it should be okay to use.
Conclusion
You shouldn't face any compatibility issues with the converted images, and you can test this out by sending the files to any device running a different operating system, such as an Android tablet, a Windows laptop or an Mac.


